
How To Create A BitTorrent File In Azureus
Posted on 28/04/2008 under Old Guides
 Images in the tutorial with a blue border can be clicked to enlarge.
1 – Open Azureus
Open Azureus. You will need to change one option before you start making your torrent: Azureus > Preferences > Queue > Seeding (mac) Tools > options > Queue > Seeding (win) Select ‘Use Super Seeding’ Click save before you exit preferences. Super seeding is best for uploading a torrent when you are the only seed (i.e. a new torrent).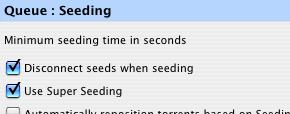
2 – Locate The Files You Want To Share
You can select any type of file, or a directory to be shared in your torrent. It is best that you place the file/directory you are sharing in the share directory for Azureus. You can see where this is, or change it by going to Azureus > Preferences > Files > Default Directory (mac) Tools > options > Default Directory (win) Make sure these are structured logically (appropriate directory names etc), as it will be in this structure that they will be downloaded.3 – Find a tracker
To enable other people to see your torrent, you must upload it to a tracker. My favourite tracker is thepiratebay.org. It’s the biggest BitTorrent tracker on the internet, and a nice simple site to use. However there are loads of others. See here: http://thebeehive.info/p/tlist.htm (you may need to register with some trackers). There will be a link on their site to ‘upload torrent’. Once you navigate to this page, they will specify an ‘Announce URL’. You will need this later.
4 – Create A New Torrent
Start making a new torrent by going to: File > New Torrent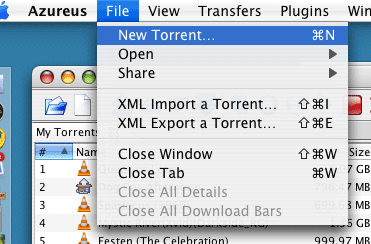
5 – Start Making Your Torrent
You now need to add in the URL from step 3 where it says ‘Announce URL’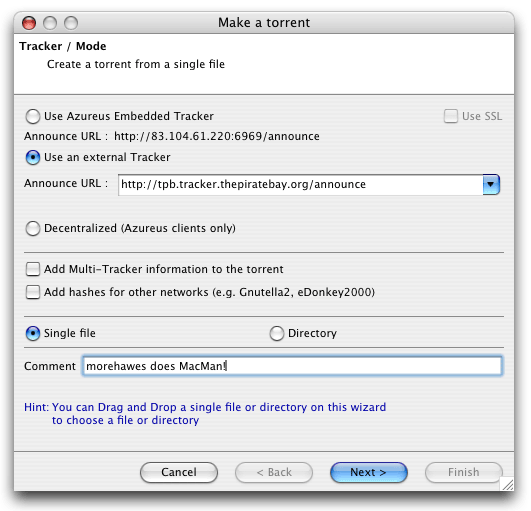 You must select here whether or not you are adding a single file, or a directory.
You can also add a comment to the torrent file. This will be viewable by people downloading the torrent – but it is not required.
You must select here whether or not you are adding a single file, or a directory.
You can also add a comment to the torrent file. This will be viewable by people downloading the torrent – but it is not required.
6 – Select Your File / Files
You now need to select your files/directory from your share directory.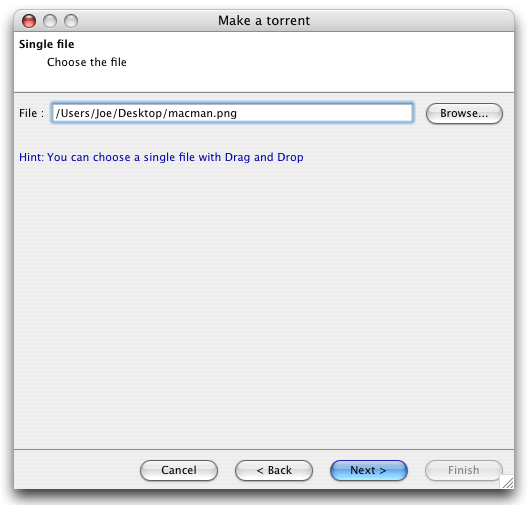
7 – Save Your Torrent
You can now name, and save your torrent (save it to your share directory) You can also select the piece size of the torrent. This depends on the size of the torrent. I recommend leaving this as default.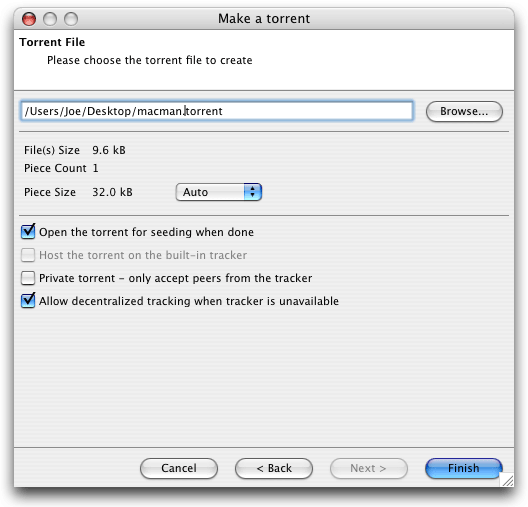 Select the option ‘Open the torrent for seeding when done’
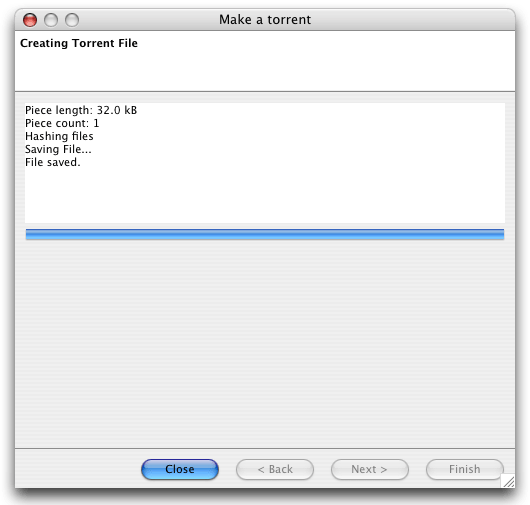 Once you see this screen, your torrent file has been created.

8 – Upload Your Torrent
You can now return to your chosen tracker to upload your torrent file.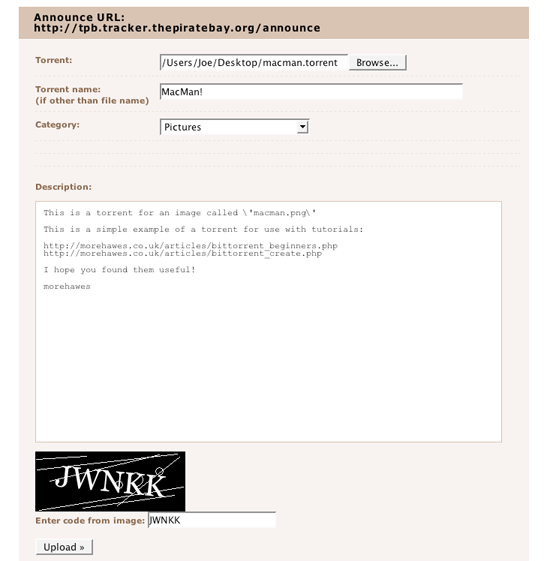 You will be able to specify a name for your torrent. Make sure you name your torrent accurately, because this is how people will be able to search for your upload.
You should also be able to add some comments to your torrent on the tracker.
You will be able to specify a name for your torrent. Make sure you name your torrent accurately, because this is how people will be able to search for your upload.
You should also be able to add some comments to your torrent on the tracker.
9 – You’re Done
Once uploaded, your torrent is now out there in the wild. You can now search for it on the tracker, and view the details page.
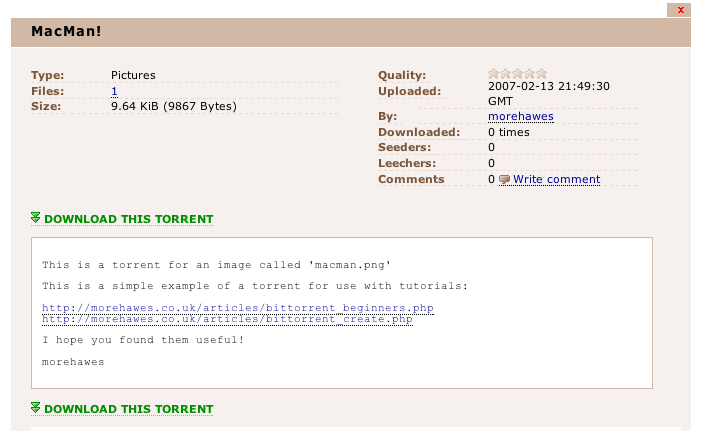 Some other trackers also let you host this file, even though you have specified a different tracker in the torrent file. So spread it about in order to get the best coverage.