My GMC Safari Camper Conversion Design
Posted on 24/04/2015 under GMC Safari / Chevrolet Astro Van
- A bed for two – having a bed comfortable for two people was a top priority. The last van bed (125cm wide) was a great size – huge for one, and comfortable for two.
- Sitting up – it is important that we are able to comfortably sit upright. From my measurements, I couldn’t make the bed any higher than 30cm if I wanted to be able to sit upright.
- More storage – the last van just about had enough storage for one. With two people, things got pretty cramped (and messy!)
- Keep it simple – I have a week to convert the van and get it ready for our road trip, so I wanted the design to be as straight forward as possible.
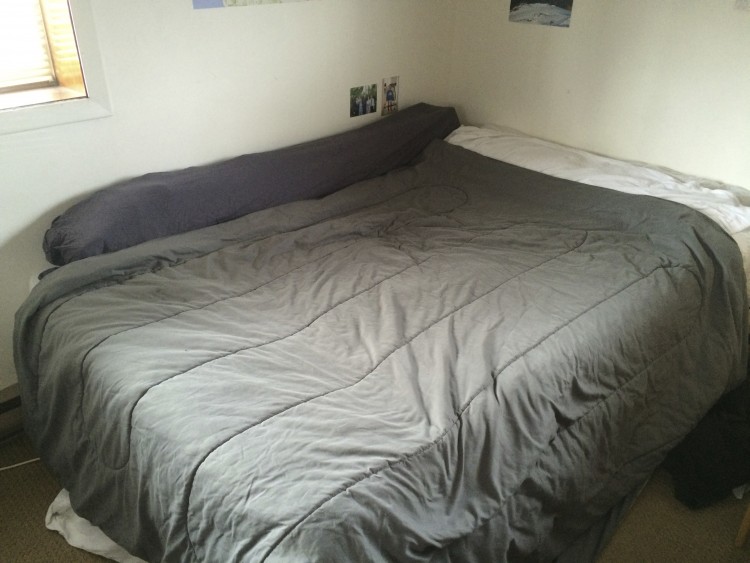 I first tried a width of 115cm and we found this to be a bit too narrow. I then tried 120cm which we found to be cozy, but not too cramped. It’s surprising what different 5cm can make. This is the width I went for in the end, which happens to be exactly two pillows wide. This means the bed will be a bit narrower than a standard double mattress (137.2 cm)
With the bed width sorted, it was time to think about storage. I had a couple of conversations with JR from OffTrack Travel, and he had mentioned that he was thinking of changing his van layout to incorporate storage along one side of the van. To begin with I thought this would be too narrow, but referring to my handy tape measure (which has been sitting on my desk for the last two months!) showed that this was not the case.
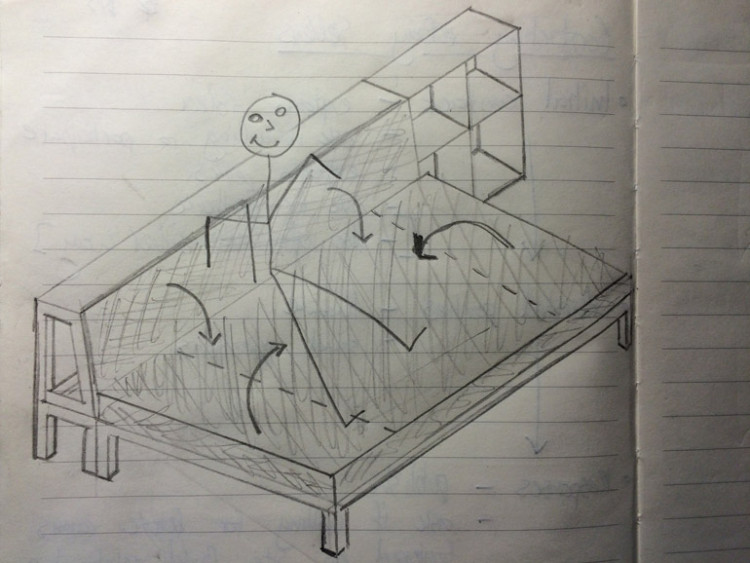
After a couple of iterations I came up with the following rough sketch:
 I then decided to have a play with SketchUp, an excellent free 3D modelling tool which I found really easy to learn. This was really, really helpful. It allowed me to digitally ‘build’ my design using pieces of wood and ply which were the exact dimensions of the lumber I will be building with. This helped me refine the design and identify a few issues, which otherwise would of needed to be resolved during the build, and may well have meant wasting time and materials.
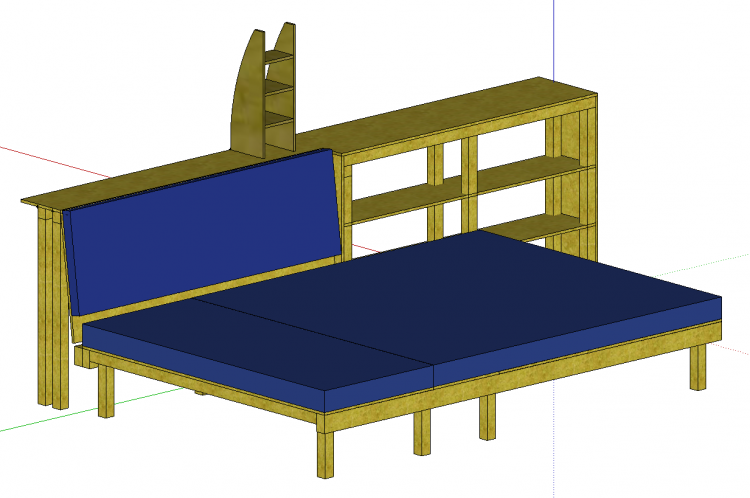
This is the design I came up with:
 Some points about the design:
- This is both a ‘bed’ and a ‘sofa’ at the same time. My last van had a bench, which allowed you to put your feet on the floor like a proper sofa, but I found that I always put my feet up. So I decided to skip this this time around. This also means one person can lie and one can sit at the same time.
- There is lots of storage under and beside the bed, doubling the storage of the old van.
- The bed base and sofa back have hinged boards to give access to storage.
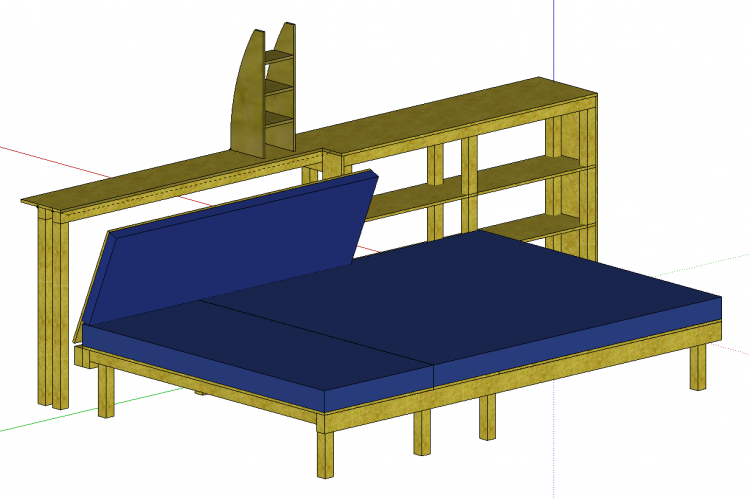 The back of the sofa is slightly sloped and will be hinged, to enable access to storage.
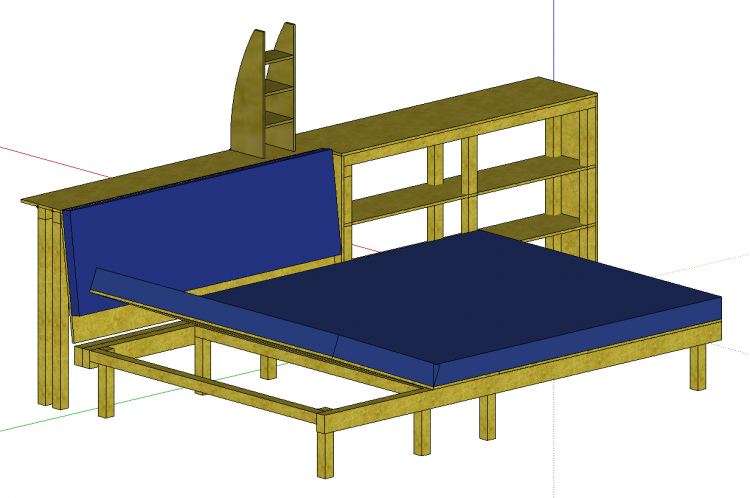
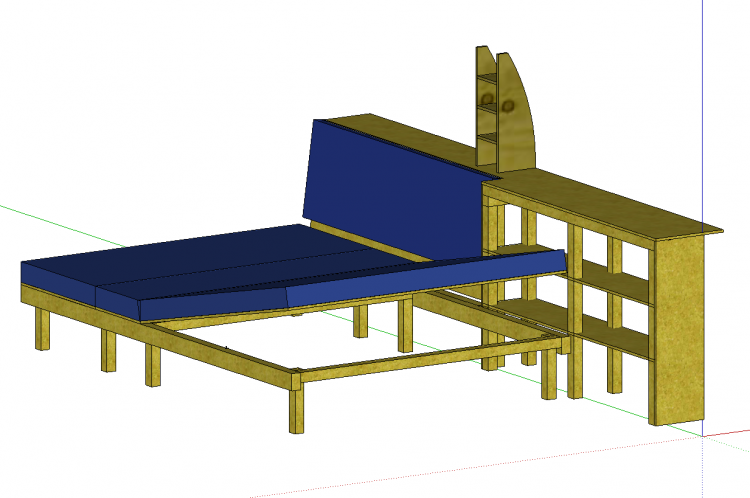 The base of the bed will also be hinged at both ends to allow easy access to storage underneath.
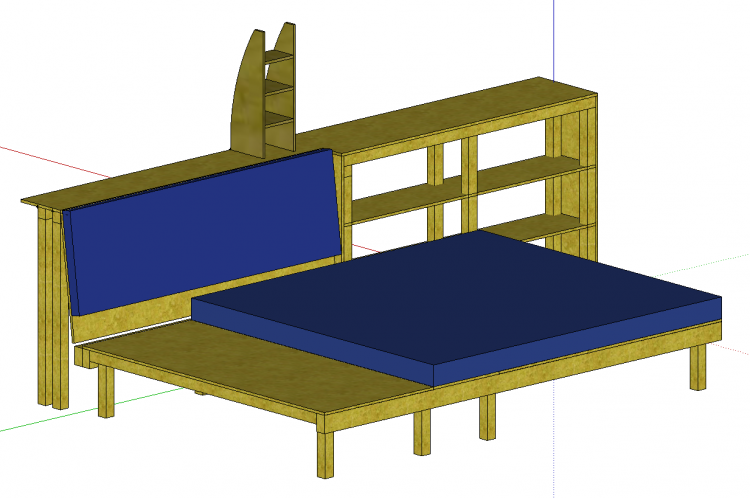 There will be a separate, detachable piece of foam which will reveal a ‘kitchen’ work surface, accessible from the rear doors of the van. This is where I will place the stove and prepare food, as with the last van:
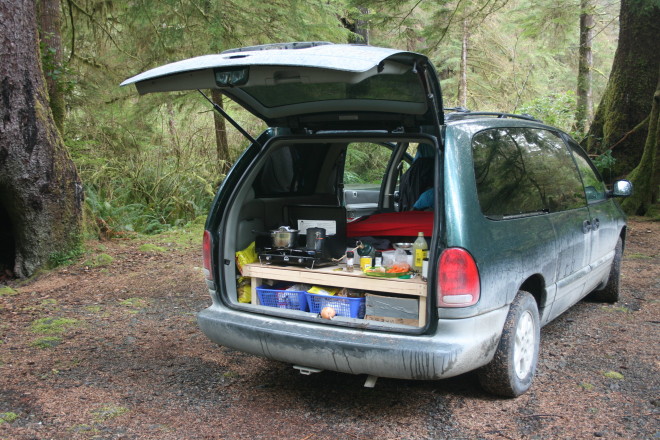 The depth of this work surface will mean that someone can still sit on the ‘sofa’ when the kitchen is in use.
I’m sure there will be plenty of small alterations when it comes to actually building the design, but building the 3D model was a really useful exercise. Due to some logistics I will be ordering the custom cut and covered foam before work starts, so hopefully the extra effort has paid off.
I’m looking forward to starting work next week and I’ll be sure to document it here once I have.

Dear Joe,
I am in the process of doing an 02 Astro AWD. I love your design!! I have been looking at a lot of different designs and the one you created is fantastic!! Do you have a building list? I am curious because I would like to price it out.
I am in Minnesota in the twin cities. I am hoping to have this project done by the end of October so that I can drive the new camper van south this winter.
I will keep you posted!!
Warm Regards,
Luke
Hi Luke,
I’m afraid I don’t. From memory I think the materials (excluding the foam and covers) cost around $200 Canadian, but I can’t be sure.
Good luck with the build and do let me know how it goes, I would love to see some photos when it’s done.
Joe
I really like it Joe. Don’t know if you have thought about this but it would be cool to get those hinges that lock into place when the bed is in a up position so you can rummage around without holding it up. They may reduce your space a little though.
Good luck with the build!
Hi Christine, Thanks! Yes I might look in to some way of keeping the ‘hatch’ open, maybe just a pole or something to wedge it. I think there will be a few details like that which I will tackle as I go along.
I hope you and Josh are well.
Joe
Hi joe. Lovely to hear from you via your blog ,using the word lumber , you are turning Canadian! ! Love mum xxx
Oops, I let that one slip through! I am trying to maintain my Britishness 🙂
Joe
Awesome! We are in process of thinking/rebuilding our van!
We are in Vancouver – if you have time when you are driving back to Yukon, I would love to see end result!
Not sure if you are thinking about removing side panels, but they to add about 15cm on drivers side and probably same amount on passenger side to the space available. Did that recently and was amazed how much space we gained.
Hi Peter,
Thanks for your comment. I did consider removing the side panels, but due to limited time, and not knowing what I would find behind there I decided to leave it in place for now. This might be something I leave for the future… or know knows, maybe I will go for it once I am actually working on it.
Thanks,
Joe